EQ, or equalisation, is one of the most important things any person working with audio should know how to do. It can be invaluable in all sorts of ways, like for removing sibilance, plosives and background noise. And the likelihood is that you probably won’t be using EQ for much more than these things if you’re creating a simple podcast (unless you’re the sound designer Dallas Taylor, creator of the sound effects filled and focused podcast, Twenty Thousand Hertz. But then I don’t see why Dallas Taylor would be reading this, except maybe to judge me. That’s what I would do in my free time if I was the creative genius, Dallas Taylor.)

Frequencies
The key thing to understanding any EQ is knowing about how frequencies work. Humans can perceive frequencies ranging between 20 hertz and Twenty Thousand Hertz..Whoops! I meant 20,000 hertz. I must have been thinking of the podcast created by the all powerful Dallas Taylor.
All things we perceive as sound are made up of pressure waves oscillating at particular frequencies, which we hear as pitch. However, the unfortunate truth is that most people past their mid-teens typically can’t actually hear frequencies above around 16,000 hertz, owing to wear-and-tear hearing damage.
The lower the frequency, the lower the pitch and the higher the frequency the higher the pitch. Simple enough! With that in mind, cast your attention to the image below, (not the one above.) It’s taken from a parametric EQ. It’s not completely necessary for the purpose of this article to know the difference between a parametric and graphic EQ, but basically, a parametric EQ allows you to control the gain of any frequency within a range, and the bandwidth of the filters. A graphical EQ allows you to individually control the gain of a fixed group of frequencies.

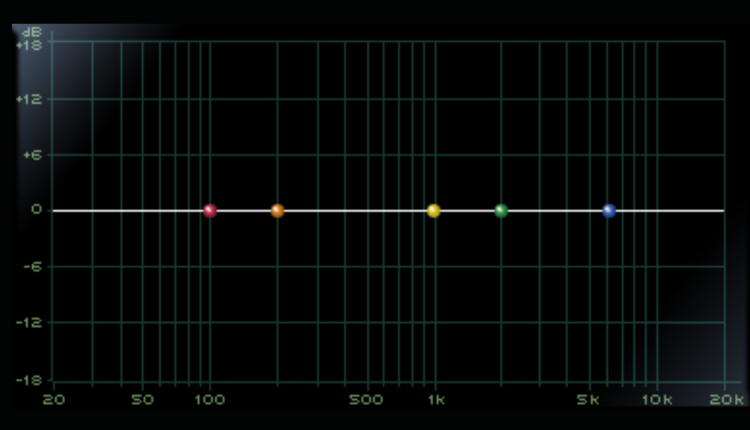
Ignoring the white line in the middle for now, you can see that along the horizontal X axis is the frequency range, which corresponds to that of human hearing. The vertical Y axis is showing the gain of the selected frequency.
So, for example, if you wanted to tidy up some annoying sibilance, you would start looking in the higher frequency range, as ‘S’ sounds are usually higher in pitch. Parametric equalisers have an individual parameter for low frequencies, low mid frequencies, high mid frequencies and high frequencies (typically labelled as LF, LMF, HMF and HF).
“Bell” or “Shelf”
LF and HF have the option of a “bell” or “shelf”. The shelf option means that the LF or HF will be attached to their respective ends of the spectrum. This in turn means that if the gain is changed, the frequency chosen won’t be the maximum or minimum point of gain, it will instead be more of a, well, shelf. This is great for removing high or low end without completely cutting out the character which they add.
The bell option means that the LF or HF will act the same as how the LMF and HMF usually do; the gain will peak at the chosen frequency creating more of a spike-like shape, or bell. The shelf is usually default but in the case of isolating a specific frequency, we want to select the bell.
Raise the gain, or isolate the frequency
So again, you can locate the frequency in this case by changing the HF. Simply moving this parameter won’t actually do anything to the audio because it’s not changing the gain of a frequency, it’s just moving the frequency selector around. For now, pick somewhere between 5,000 hertz (5 kHz) and 10,000 hertz (10 kHz).
The first thing you want to do is tighten the bandwidth of the HF parameter; the bandwidth parameter is usually labeled on an EQ as ‘Q’. The next thing you can do is one of two things: raise the gain or isolate the frequency.
Option one means you raise the gain of the HF and then start scanning around that high frequency range to see if you can get the sibilance to stand out. Once you’ve isolated the frequency, all that’s left is to bring the gain down to where the sibilance can no longer be heard and you’re done. But this is less accurate and can get quite loud, especially when you’re hunting for a relatively piercing sound.
Your second option depends on the equaliser you’re using, and whether your EQ has the choice to isolate the frequency you’re changing, so you hear only the frequencies within that bandwidth. In this case you can look for the sibilance more accurately. Some plugin EQs have a button to click which achieves this and some require you to hold down keys while changing the frequency parameter. In any case, beware of lowering the gain too much in the event of sibilance. This can result in an audible lisp for the speaker because you’re effectively removing the frequency that creates an ‘S’ sound. It’s a bit of a balancing act to use the right amount of gain to remove it. If you think Dallas Taylor ever experiences sibilance while speaking on mic, well then you can think again!
High Pass Filter (HPF)
If someone on mic accidently nudges the mic, packs on the plosives or becomes a bit emotional and starts banging the table with their fists, it will probably leave an audible punch in the low end of your recording. This is where a high pass filter can come in handy.
A high pass filter (HPF) does what it says on the tin: it allows only high frequencies to pass through it. A low pass filter (LPF) does the same thing but vice versa. Americans might refer to these instead as a ‘low cut filter’ and a ‘high cut filter’. There’s only really two parameters to worry about here. The first is decibels per octave (dB/oct). This essentially refers to how quickly frequencies start to roll off.
For example, 6 dB/oct set at a frequency of 500 hertz means that when a sound begins to hit frequencies at 500 hertz and below, they start to become less audible until they can’t be heard at all around 50 hertz. All we need to know here is that this is a relatively gentle way to cut off lower frequencies. But this is not always what we want. As we increase the dB/oct all the way up to 24 dB/oct, we will notice that there’s a much harder cut off point for lower frequencies. If you’re curious to know what’s happening with either setting, here’s what’s going on: per octave in the frequencies there is a 6 or 24 decibel decrease starting from where we set the frequency for the HPF or LPF. Therefore, 6 dB/oct is obviously more gradual than 24 dB/oct.
Output Volume
Last but not least, if you’re increasing or decreasing gain in your EQ, then you will want to keep an eye on the output volume of the sound that is being equalised. If you decrease gain then you might notice that the output is now lower compared to the input. The opposite is possible for increasing the gain in an equaliser. When you use an EQ, you’re literally boosting or lowering the volume of certain frequencies, so this is no surprise. Just adjust the output gain accordingly, making sure a sound has not become too loud or too quiet.
At The Podcast Studios we work with companies, organisations, and individuals to help them tell their stories in audio form. If there is any part of your podcast journey that needs a professional touch, from start to finish, get in touch today by contacting us at [email protected] or visit our website at www.thepodcaststudios.ie
If you want to write for the podcast section of Headstuff.org, email us at [email protected]